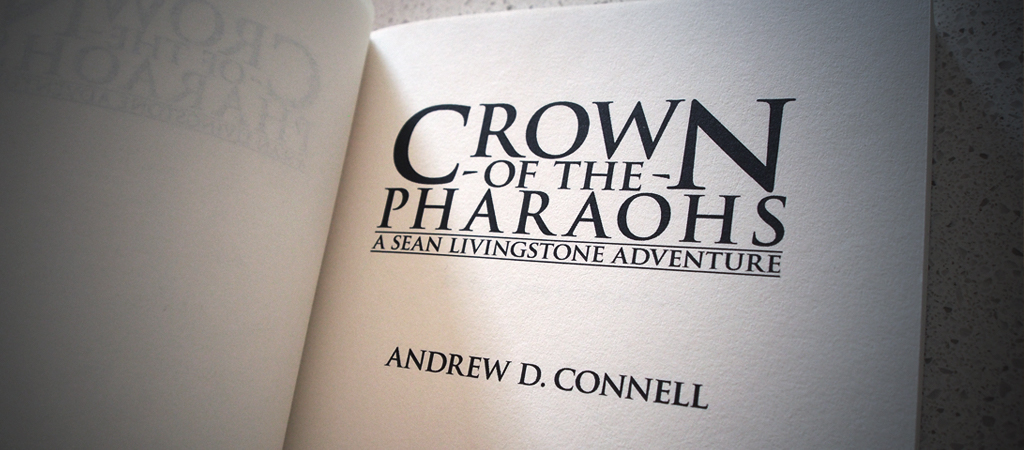
If you’ve never used Adobe Indesign before, don’t worry, my step-by-step guide will help you create a print-ready version of your book. I’ve successfully created two paperbacks, Crown of the Pharaohs and Ark of the Gods, which are available as POD (Print On Demand) titles available through Amazon’s Kindle Direct Publishing.

My novels were created in the 6 inch x 9 inch (152.4mm x 228.6mm) format, but the following guide can be applied to the majority of paperback sizes, all you need to do is change the dimensions of the pages in the setup and you’re good to go. There are no illustrations in my book, just basic text with customised chapter headings and two JPEG images at the front of the book for specifically designed title pages.
Back in 2016 when I released my first POD book, I based all my measurements on a book I liked the style of. I took a ruler to everything on the page, measuring where the page numbers, chapter titles, headers & footers, and main text were in relation to each other and the edge of the page. If you’re curious about what font and point size to use throughout your book then find a book with a style you like and check the first few pages. Usually, within the copyright page you’ll find the Typeset used, including the font and point size. So, if you like the look of a certain book, analyse the layout and base yours on the same styles.
Document Setup
Assuming that you have Indesign installed and ready to go, here’s the initial steps to setting up the manuscript correctly.
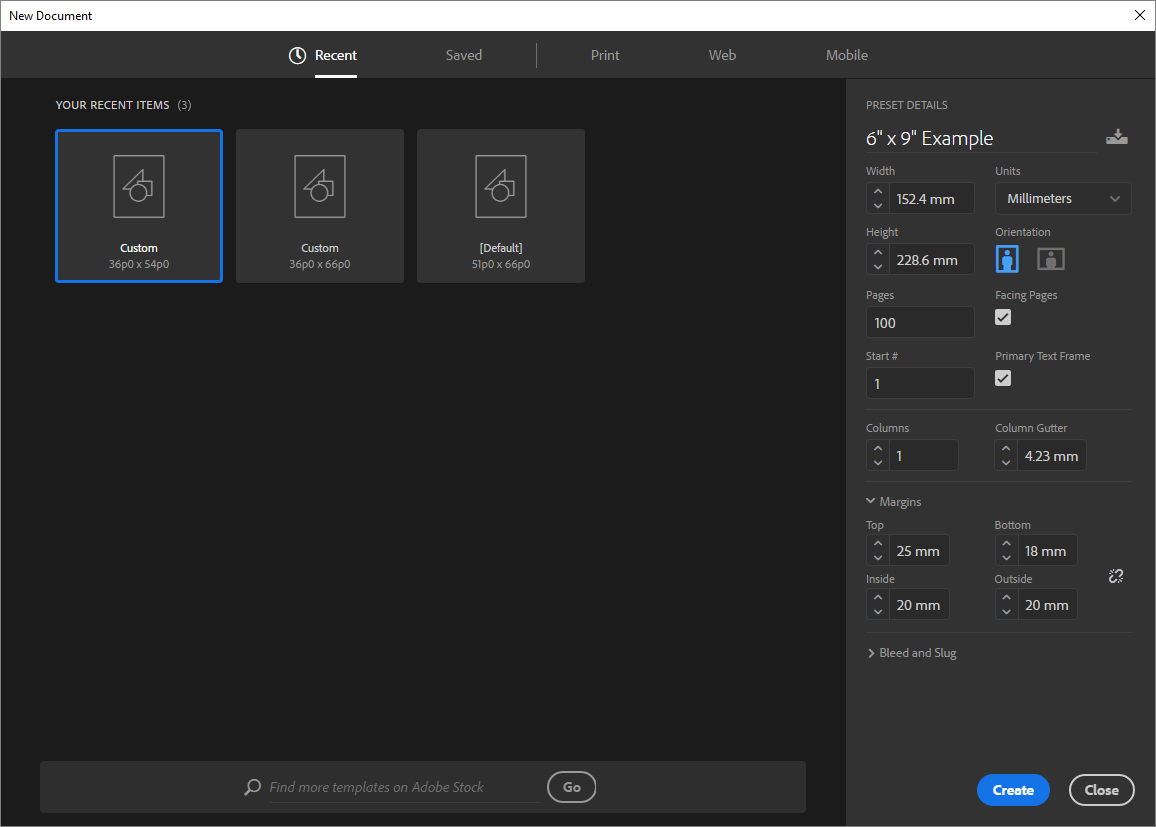
- Open Indesign and select New Document. As you can see I’ve set the width (152.4mm) and height (228.6mm) to match my book size, using a Portrait Orientation. I’ve just added 100 pages to start, but you can always add or subtract pages later.
- Select Facing Pages and Primary Text Frame (Helps with auto text flow, more on that later).
- You only need a single column of text, so the gutter is not applicable. If you have two columns or more of text in your book, then this setting can be adjusted to suit.
- My margins are set to Top 25mm, Bottom 18mm, Inside 20mm & Outside 20mm.
- No need for the Bleed and Slug because nothing extends beyond the border of my pages.
- Then select Create.
Adding Text & Setting Styles
Now we need to add our text into the Indesign document. There are a couple of things to be aware of here that will save you hours of frustration later on.
- Firstly, if you have a long book with a lot of chapters then I suggest you break it down into separate documents for each chapter. That gives you a lot more control of the document as it’s coming into Indesign. You can check each chapter as a separate segment and make sure it all looks correct. I’ve found bringing in the entire manuscript can be a bit hit-and-miss, particularly if your document styles are inconsistent coming from a Word file.
- Secondly, and this is a big issue! For some reason when you bring in a Microsoft Word DOCX file all the non-breaking hyphens are stripped and disappear entirely from the document. I only realised they were missing after I’d laid out my entire book, so rather then go through the entire setup phase again, I meticulously located every missing non-breaking hyphen and manually replaced them. Took me hours. Thankfully, there is a solution that keeps the non-breaking hyphens in place. Bring your text in from a DOC file instead, which means just re-saving your manuscript or break down of the chapters as DOC files. Hopefully this bug gets sorted out in the near future.
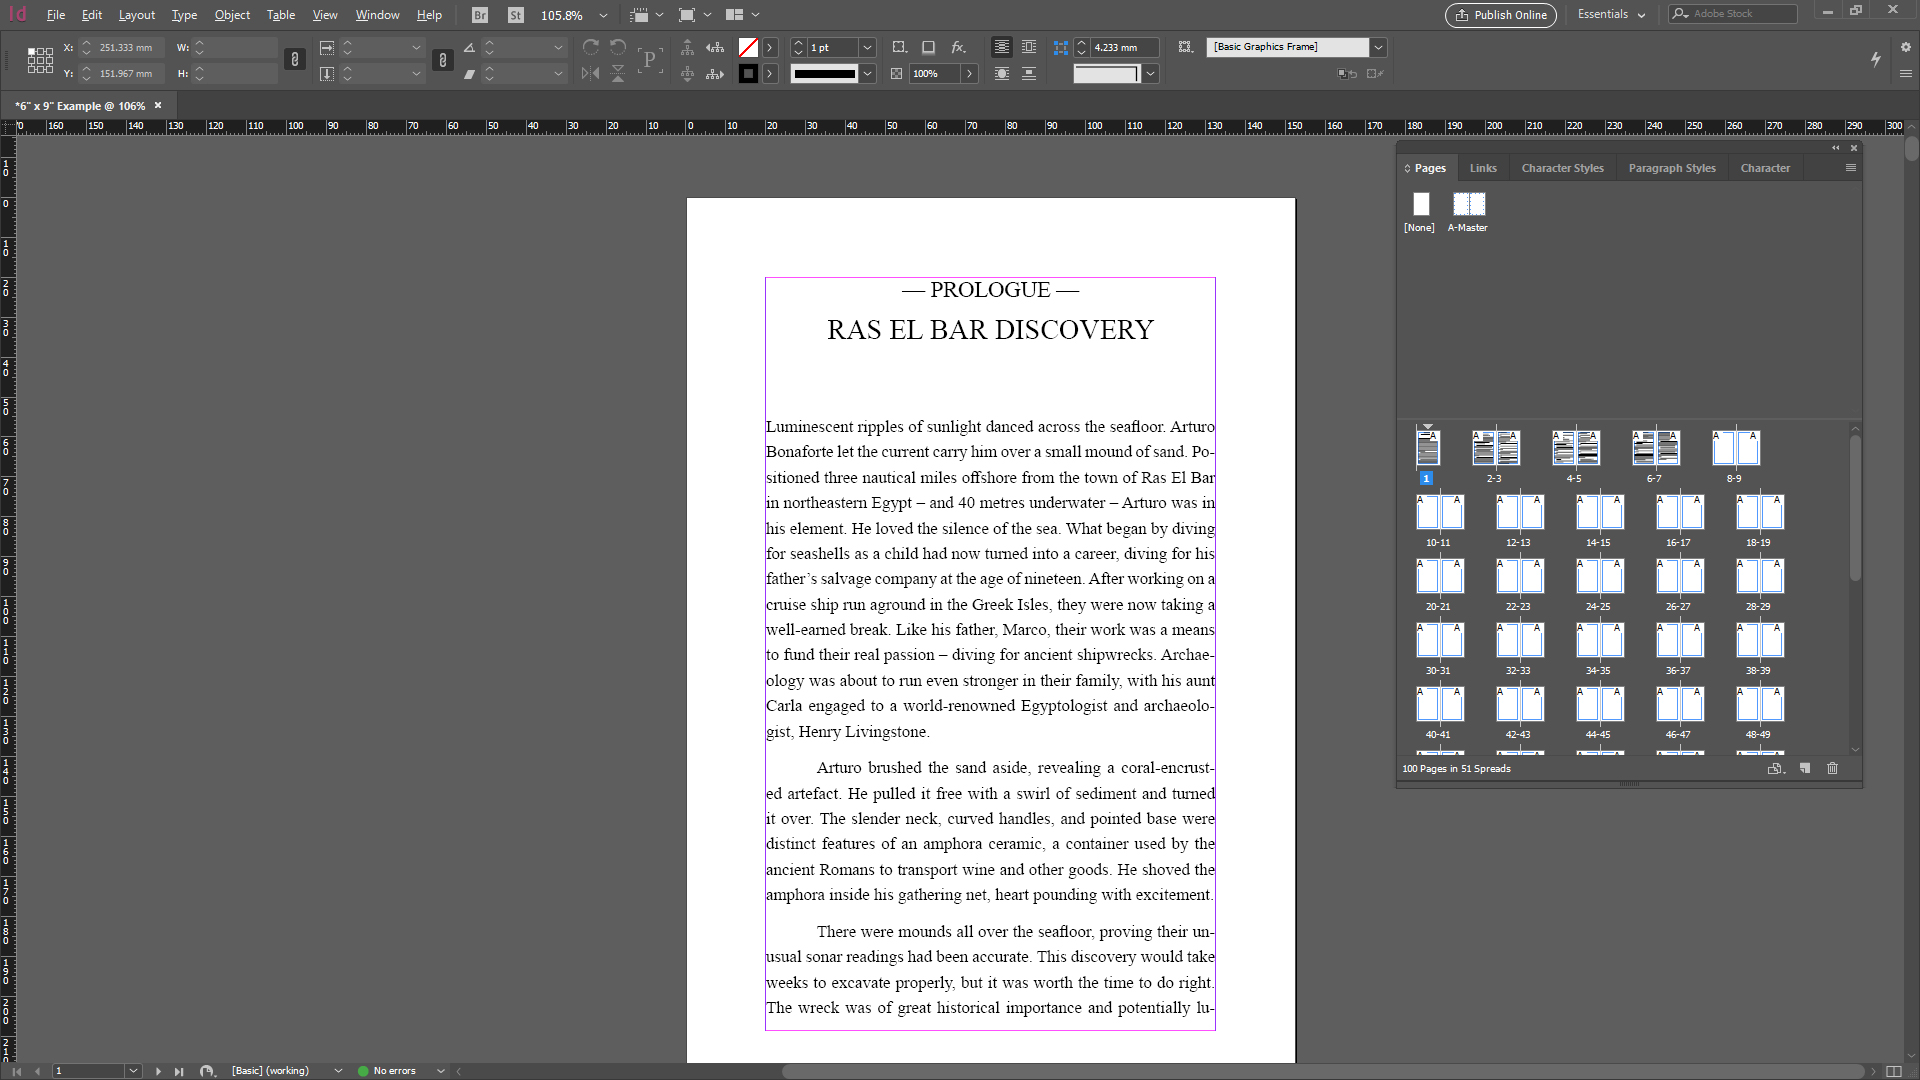
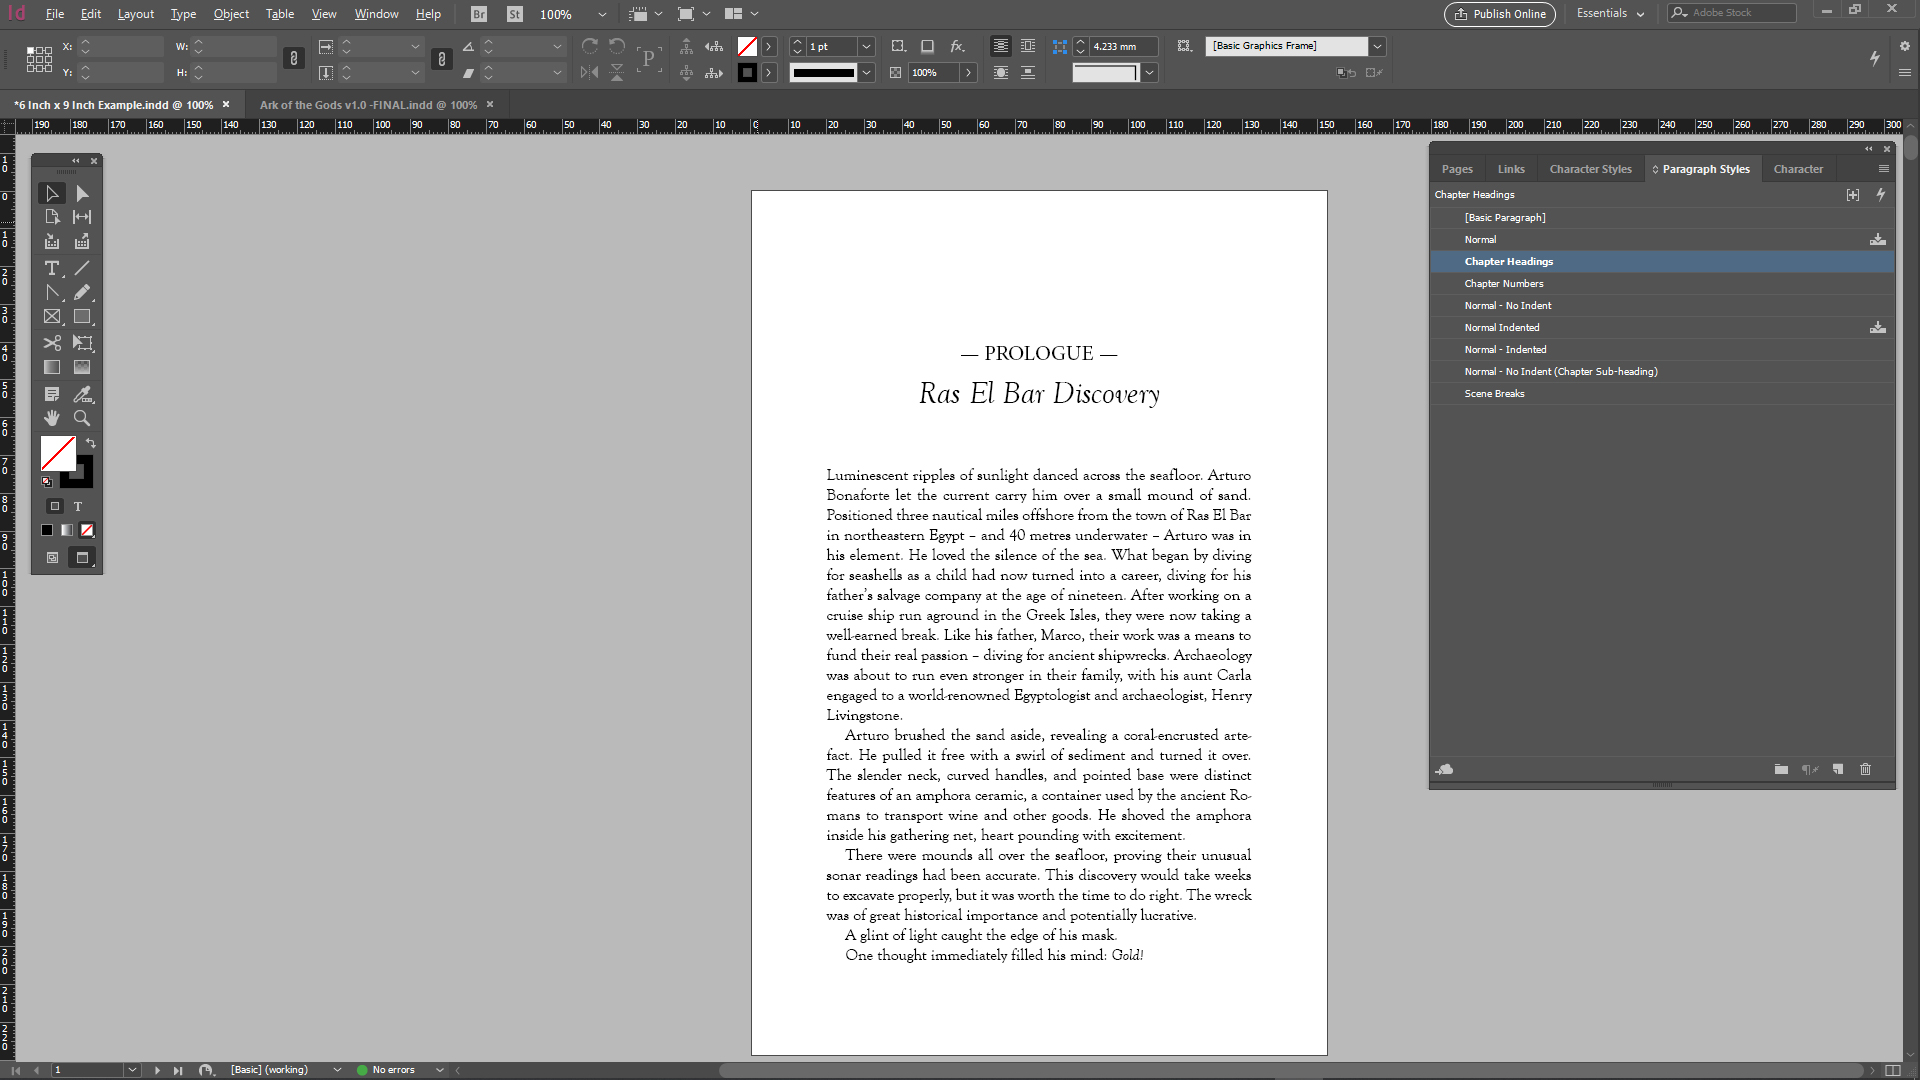
Here’s what your clean Indesign document should look like before we bring in the manuscript.
![]()
Let’s get started on bringing in some text. For this tutorial I’ll import one chapter at a time from my book ‘Ark of the Gods’ as an example.
- Click on File>Place and locate your first chapter. You will notice your Indesign pointer now has a small block of text attached to it. Position the pointer in the very top left of the purple margin box (right on the purple lines), hold down the SHIFT key and click the left mouse button (You should see a squiggly line with an arrow appear next to your pointer). This places the text onto the page and flows it onto the following pages – the Autoflow Text function I mentioned earlier. If you don’t hold down the SHIFT key it will only create one page of text without automatically placing the entire chapter.
- You should now see the pages of text on the Pages Window (Press F12 to activate if you don’t have it open) flowing across multiple pages.
- You will also see that in the Paragraph Styles window (Press F11 to activate) the styles from Word have been imported and applied as well. I have three basic styles here. Chapter Headings, Normal – Indented & Normal – No Indent. Indesign has automatically recreated and applied these styles. A good tip is to really clean up your Word document, making sure your styles are consistent before you place it into Indesign. My manuscript is a straight-forward novel with no unusual formatting, so I only needed three styles. I won’t be keeping the Word styles for the final layout of the book, but we’ll bring in the remainder of the manuscript before changing these styles, that way the style changes will apply to every chapter of the book automatically.
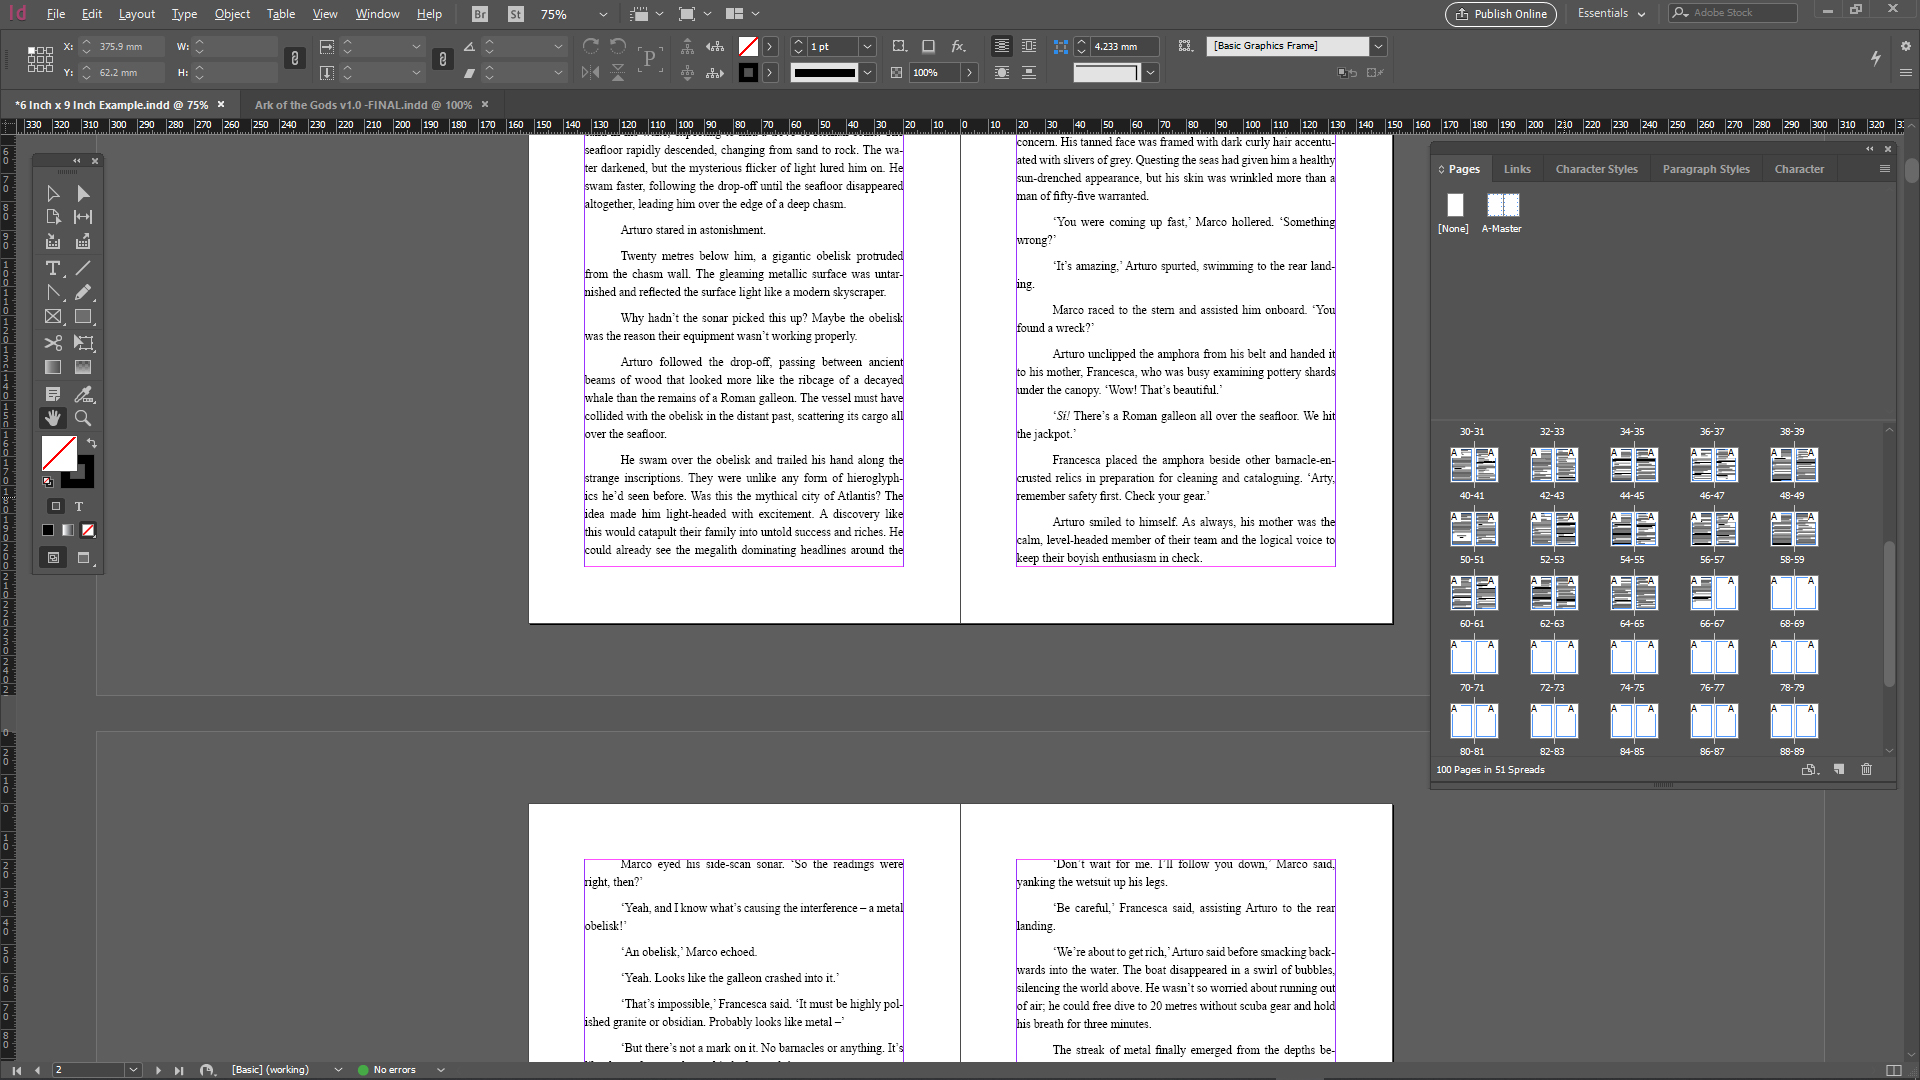
- Return to the Pages View, double-click on the next blank page and start inserting your remaining chapters using the File>Place method used earlier. Always check the last paragraph of your chapter to make sure the entire body of text has been imported. I’ve just inserted the first five chapters of my book for this example, which has taken me up to 66-67 pages.
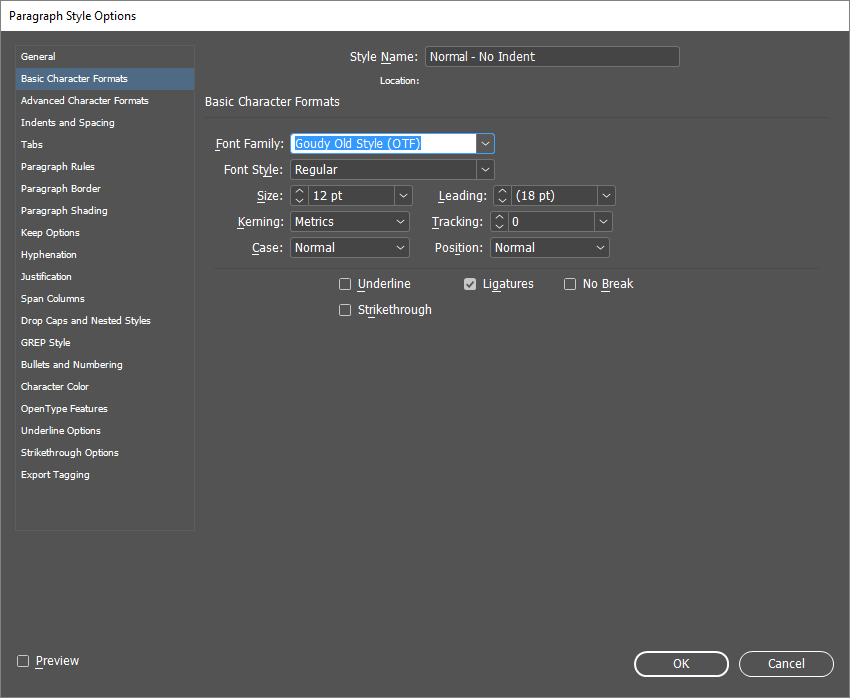
- The next step is to adjust the Paragraph Style to the final styles we’ll be using in the book. Make sure your cursor is not active anywhere in the text of your document (do this this by clicking anywhere in the grey area outside the page), click your Paragraph Styles tab, then right-click on the first style to change, for this instance it will be Normal – No Indent (Or whatever name you gave the equivalent style in your document). A new window should pop up displaying the Paragraph Style Options. Click on the Basic Character Formats and make the necessary changes to your style. For ‘Ark of the Gods’, I changed Times New Roman to Goudy Old Style with a Size of 12pt, Leading of 18pt, and adjusted the Kerning to Optical.
- Then click the Indents and Spacing tab. Make sure alignment is Left Justify, all the other settings should be 0mm for the non indented style.

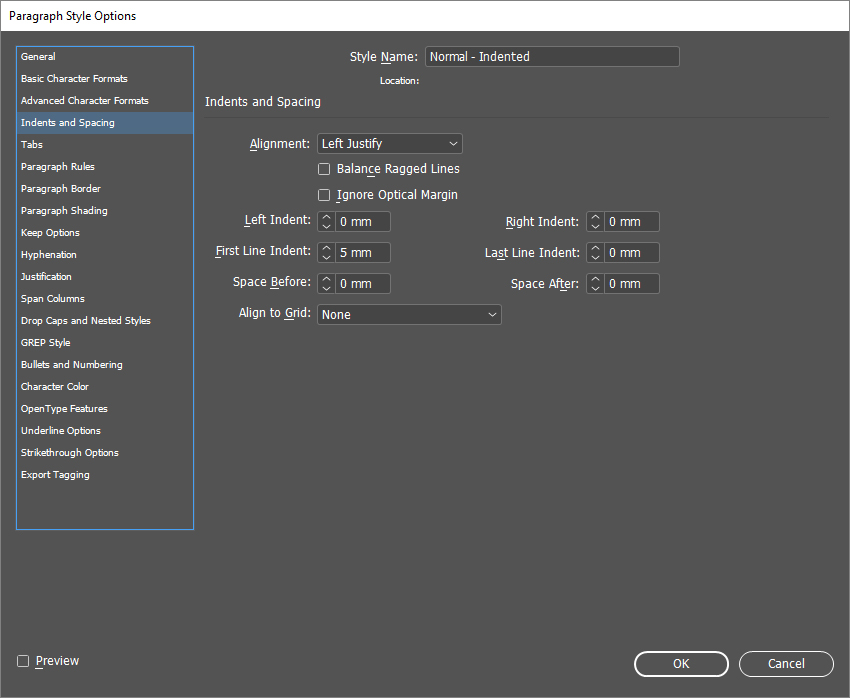
- Go through the exact same steps for the Normal – Indented style (or your equivalent), but in the Indents and Spacing tab set the First Line Indent to 5mm.
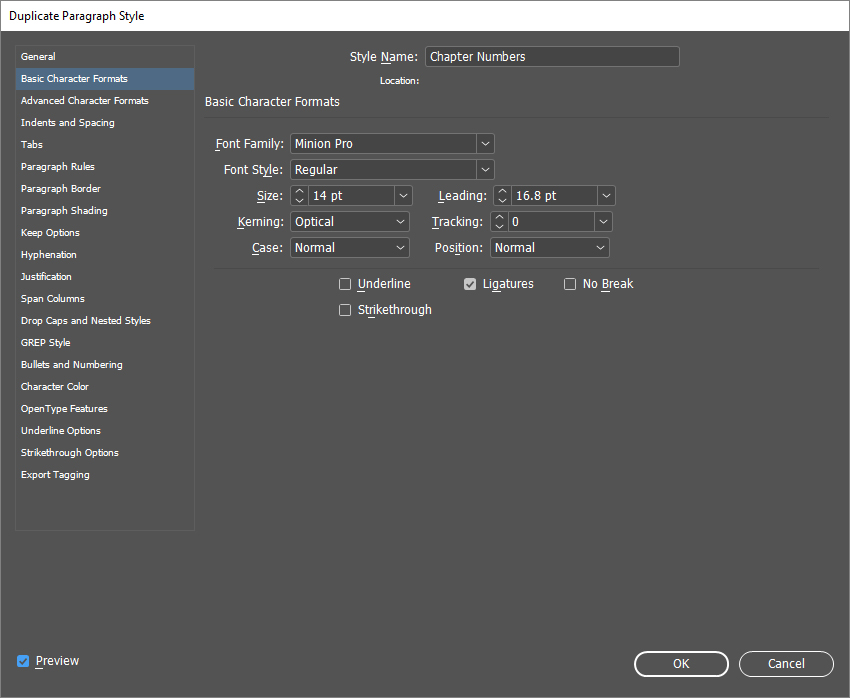
- The next adjustment is to my Chapter Headings style. I created the look by using two lines with two separate styles, the first for the ‘Chapter Numbers’ and the second for the ‘Chapter Headings’. I duplicated my ‘Chapter Headings’ style in the Paragraph Styles tab, renamed it to ‘Chapter Numbers’ and set it up with the font Minion Pro – Regular, Size 14 pt, Leading 16.8 pt and Kerning set to Optical.
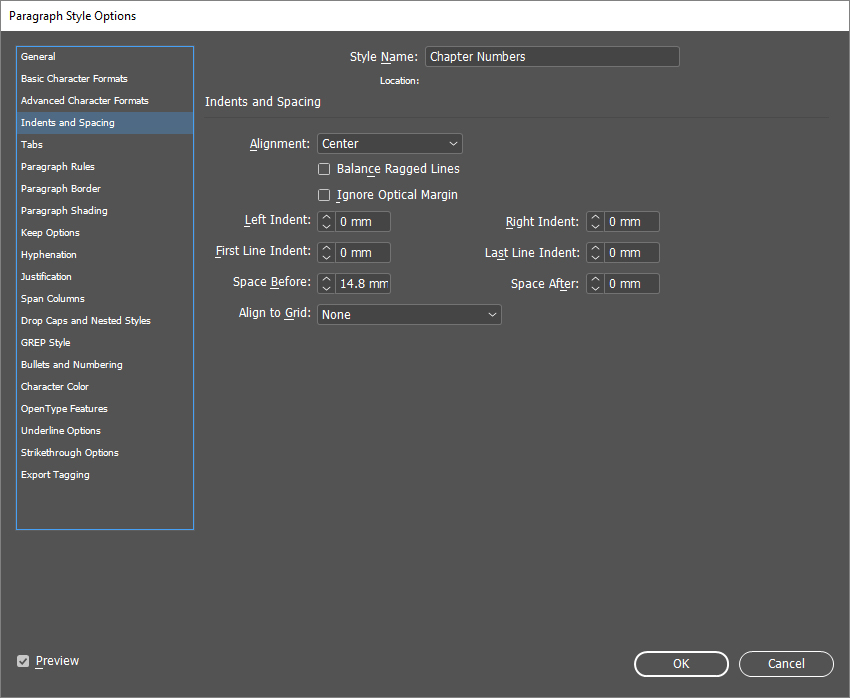
- Still working in the ‘Chapter Numbers’ Paragraph Styles, click on Indents and Spacing. The Alignment is set to Center and I adjusted the Space Before to 14.8mm so there would be a blank space above my Chapter Number, pushing the start of the chapter down the page, creating a blank space above it. This was more for aesthetics than anything else. You can play with this to achieve your desired result. I also had a blank ‘return’ entered above my chapter number with the same style, just to push me down about a third into the page.
- Next, I adjusted the ‘Chapter Headings’ style with the font Goudy Old Style (OTF) – Regular, Size 24 pt, Leading 32 pt and Kerning set to Optical.
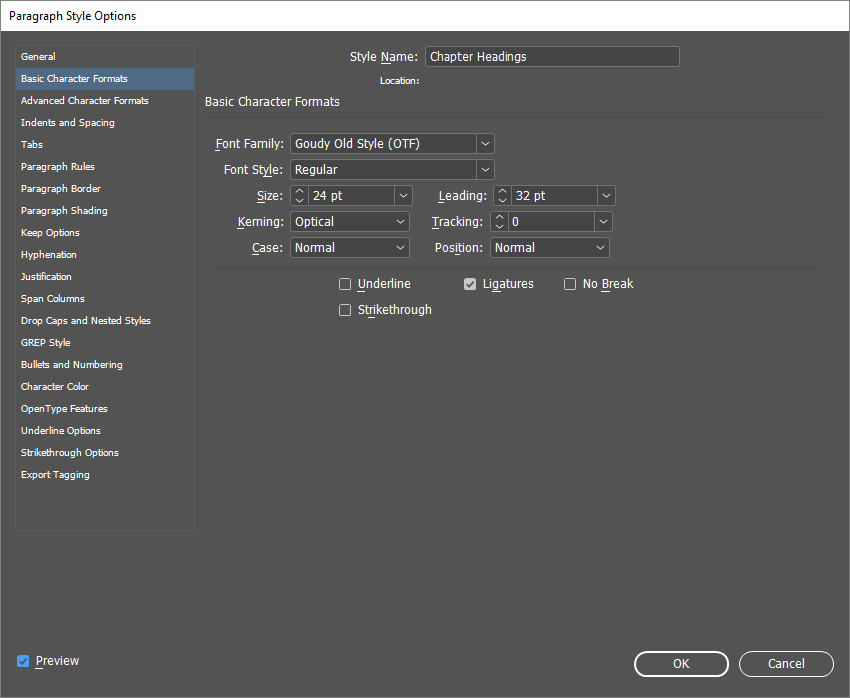
- For the Indents and Spacing in the ‘Chapter Headings’ I used Alignment: Center, and added 15mm to the Space After setting, so the first paragraph of text would be separated nicely from the heading.
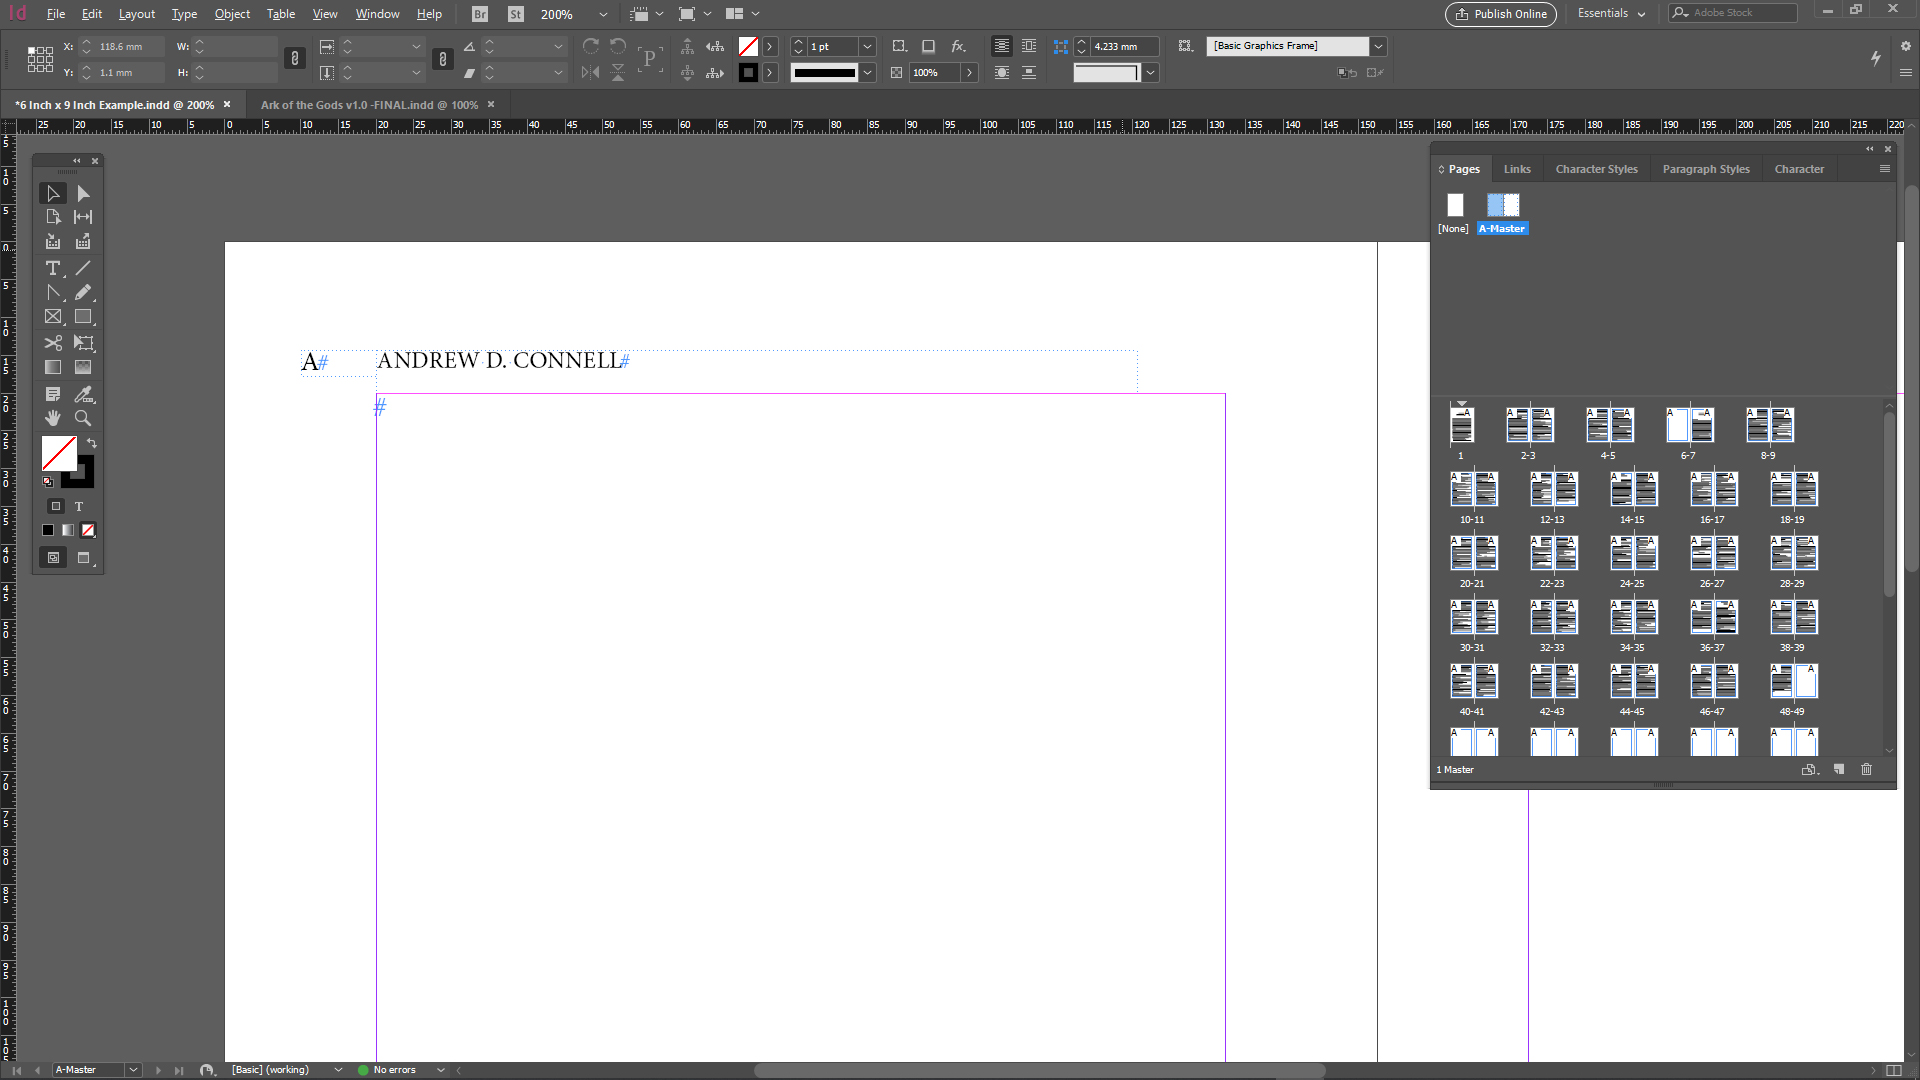
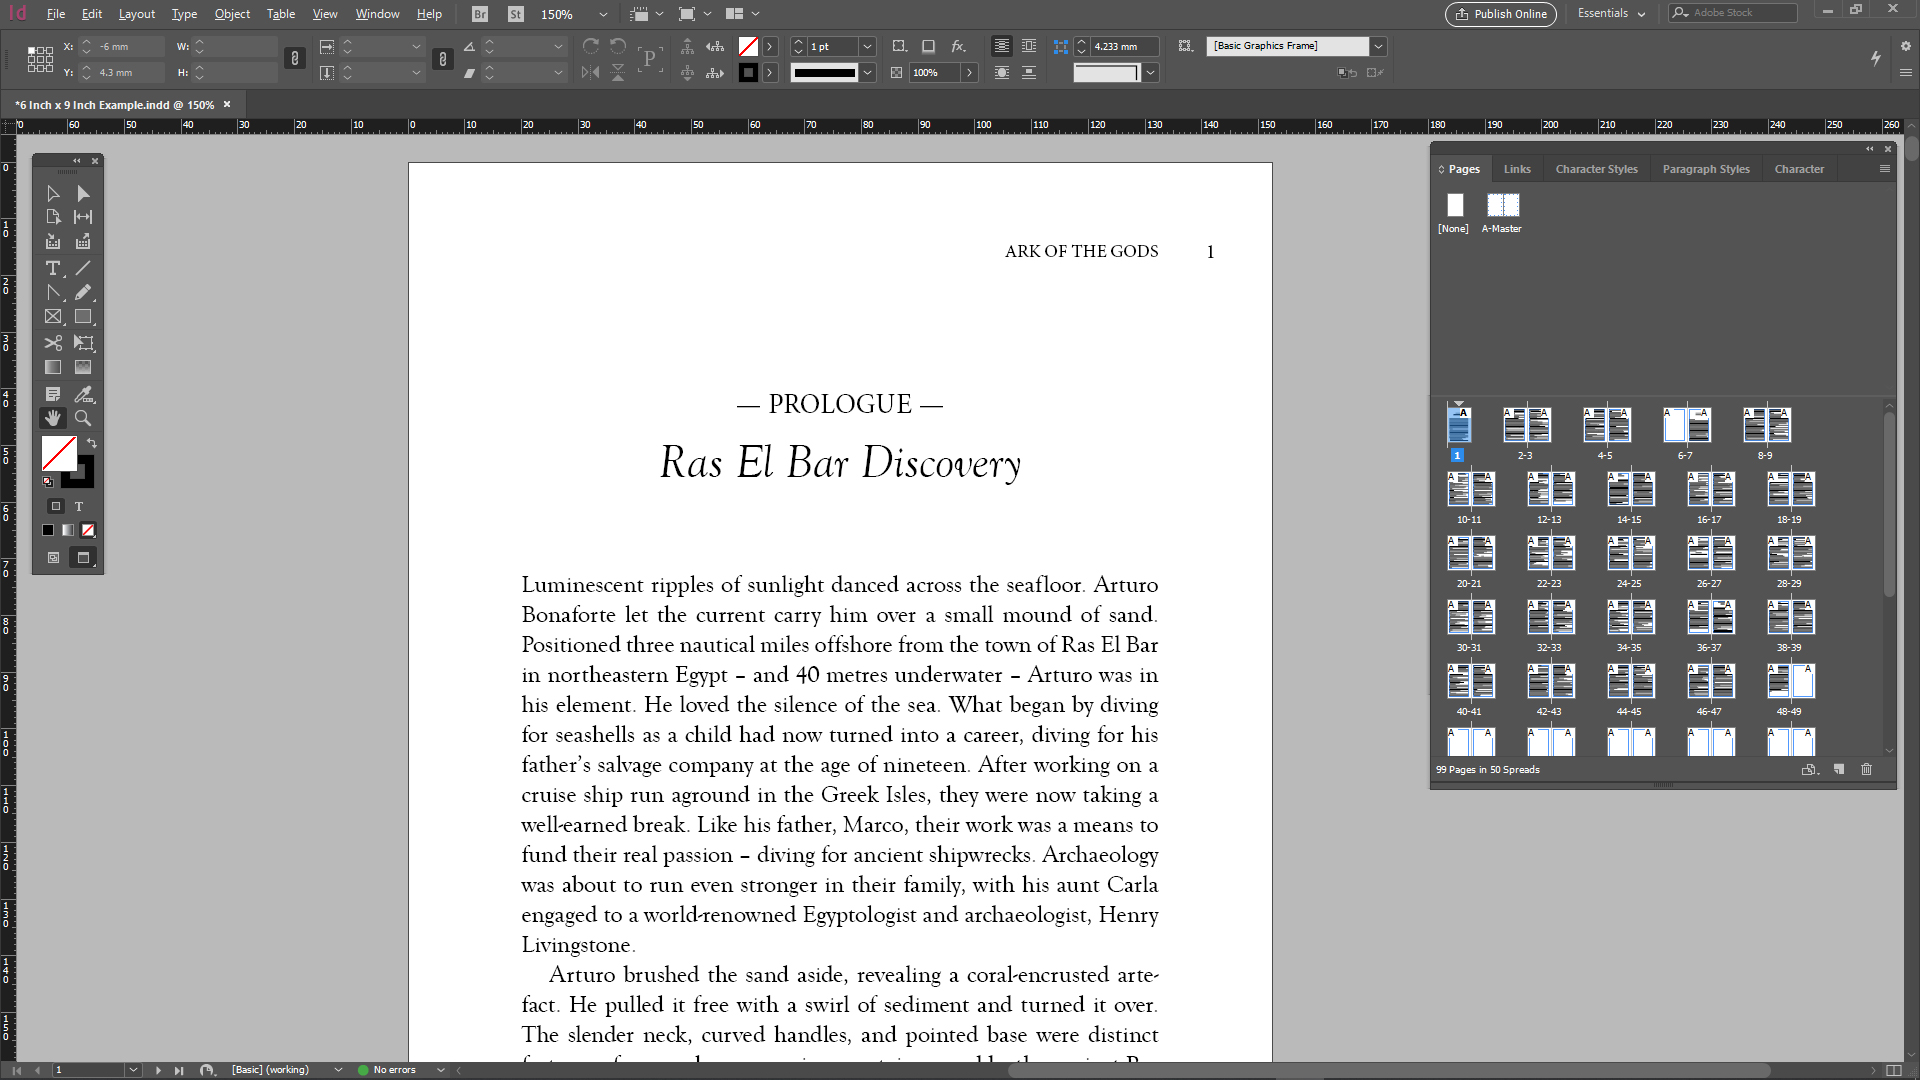
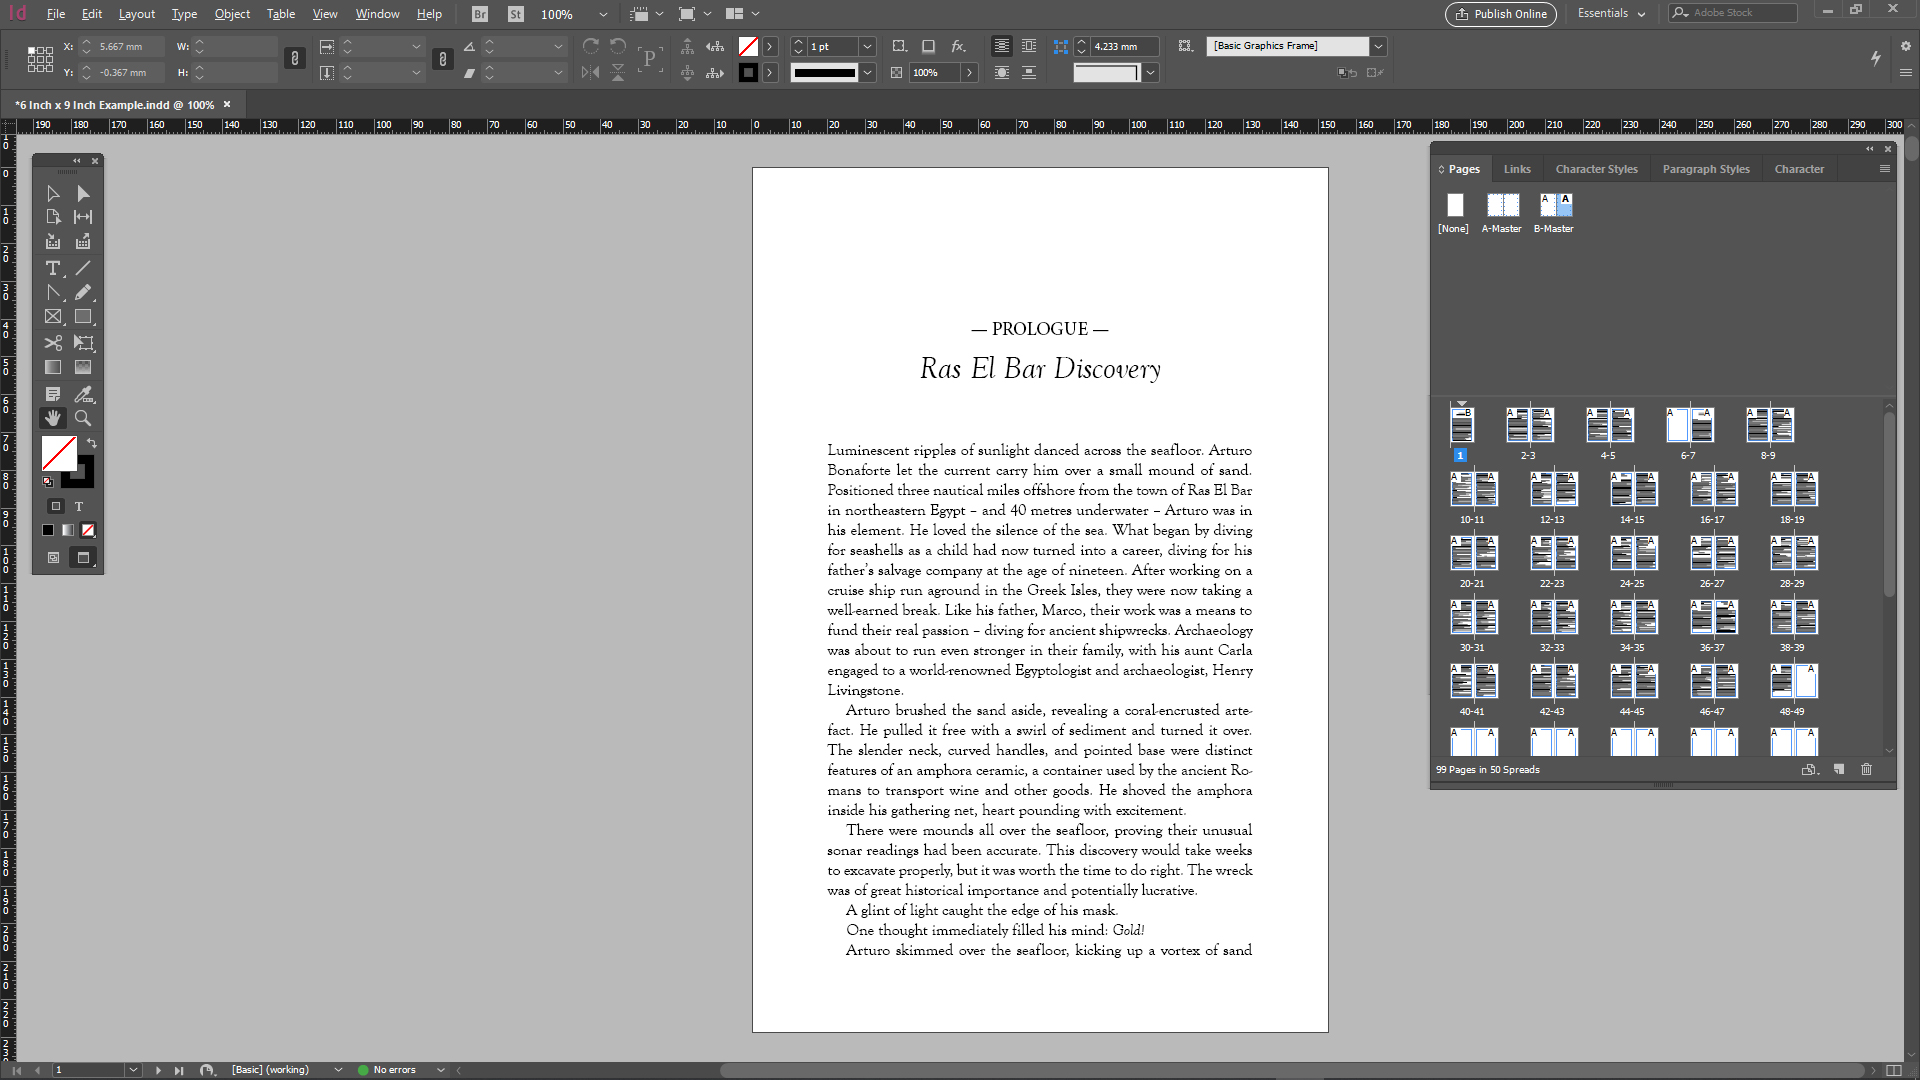
If you’ve done everything correctly then you should have a document that looks like the two images below, with the correct fonts, spacing, and indents. The next step will be to apply page numbering and assign Master Pages to the document for further styling.

Applying Master Pages & Adding Page Numbers
The next step will be to set up the Master Pages, basically the template of each page for the entire book. During this process we can add Headers, Footers, and most importantly, Automatic Page Numbering.
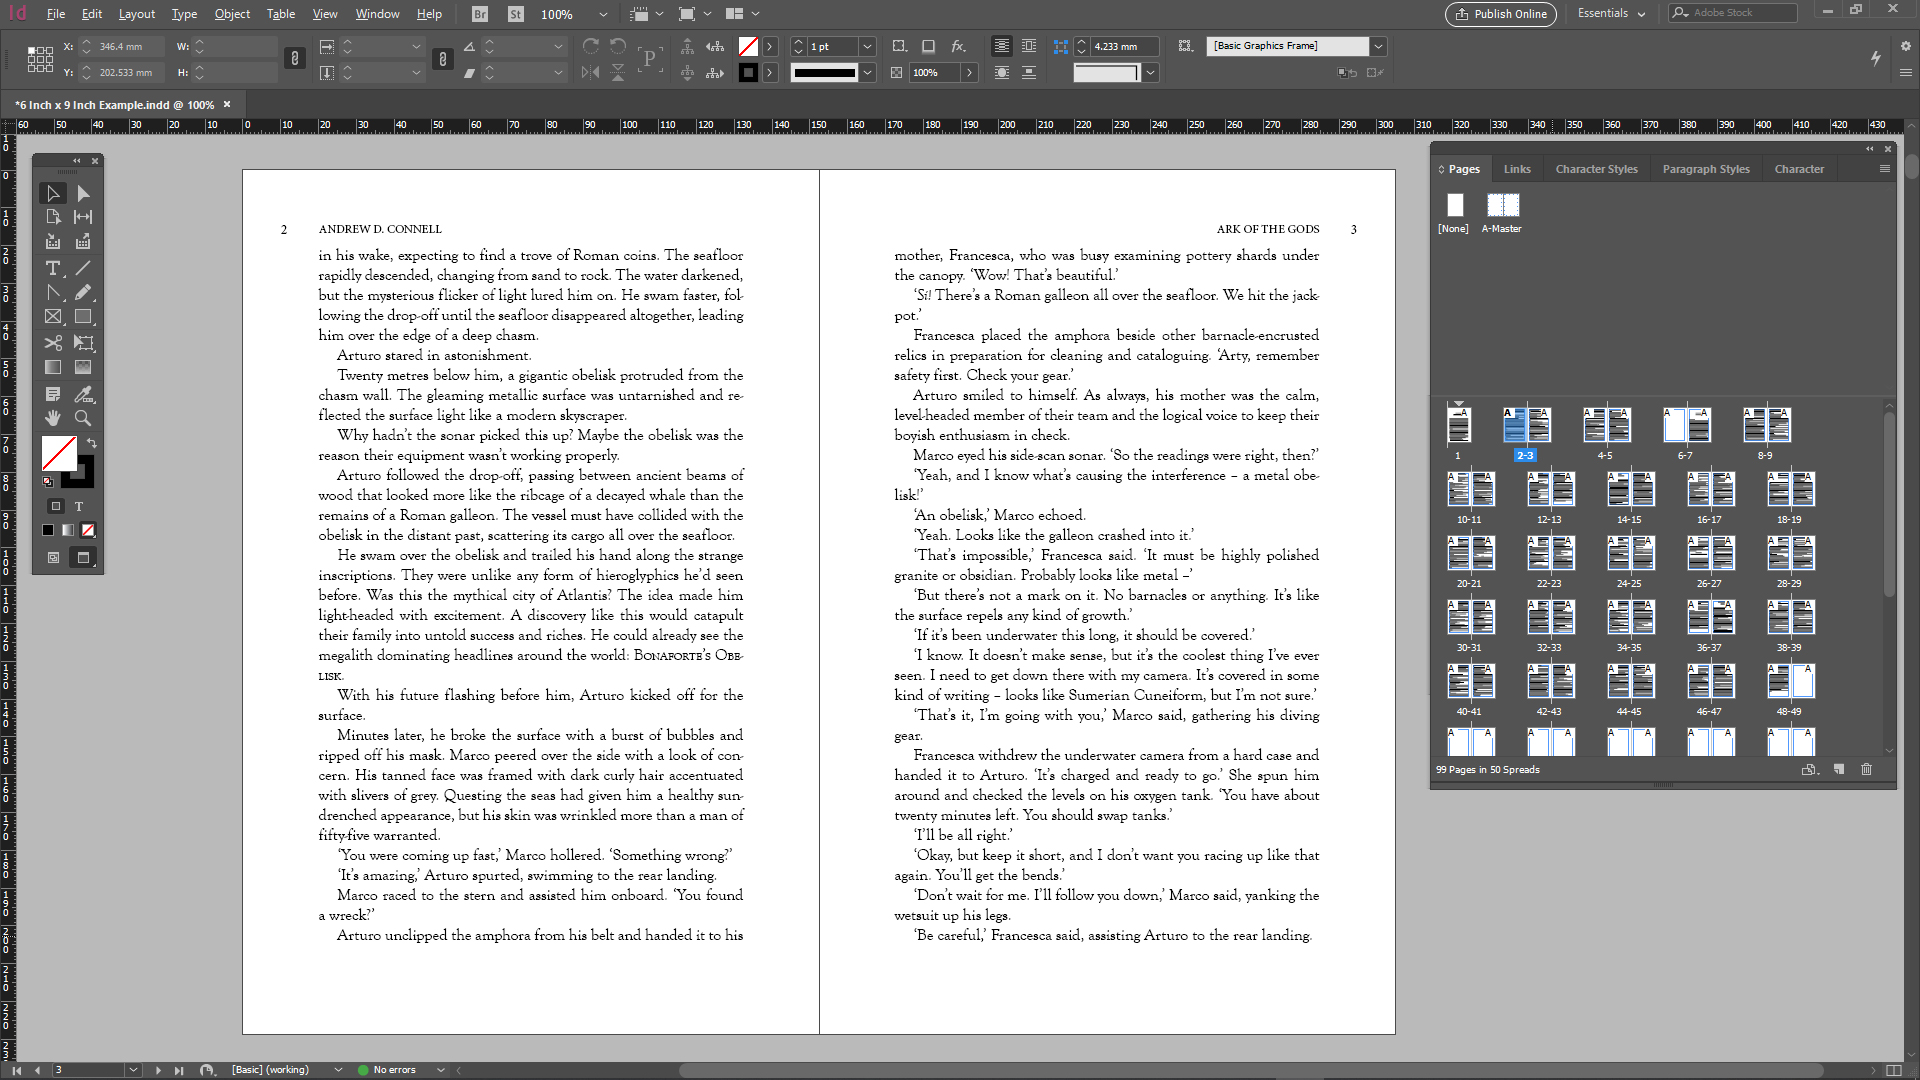
For ‘Ark of the Gods’ I positioned page numbers on the upper left and upper right hand sides of the facing pages. I decided not to use footers, but instead placed everything at the top of my page in the headers. Aside from the page numbers, I have my name ‘Andrew D.Connell’ on the upper left of every left-facing page next to the page number, while on the right-facing page I have the book title ‘Ark of the Gods’ followed by the page number. You could consider placing the current chapter title in this space, a process that’s a little more involved and something I decided not to do.
The page numbers, author name, and book title don’t appear on pages that start a new chapter or in the front and back matter of the book, including copyright, dedications, special thanks and acknowledgements.
To set all this up we need to organise our Master Pages.
- Double click on the left page of the A-Master page spread on the Pages tab. This will open up the A-Master two-page spread. This is where you set up all the design elements for facing pages throughout your book. Making sure only the left page on the A-Master is selected blue, click the Text Box Tool and draw a box in the header or footer where you want your text or numbers to appear.
- When the size and position of your text box is correct, along with your title, chapter or author name typed into it, you can set the font style, point size and any other details. On my pages I had two separate boxes just next to each other, one for the page number, the other for my name and title of the book.
- To add the automatic page numbering, select the text box you want it to appear in and from the menu select Type>Insert Special Character>Markers>Insert Current Page Number or the shortcut (Ctrl+Alt+Shift+N). This will add the letter “A” to the text box. I know it doesn’t look like a number yet, but it will change when you return to your manuscript pages.
- Once you have the left facing page correct, then do exactly the same for the right facing page. You can go through the exact same steps as 1-3, or a better shortcut is to select one of the text boxes you created for the left facing page, hold down Shift+Alt and drag it to the right facing page, basically copying all the elements and settings from that text box to the opposite page. Then adjust your text and formatting to suit and you’re done.
- Return to your manuscript pages by double-clicking on any of your text pages in your pages tab and you should see your headers and page numbering like the image below.
The A-Master page set up works perfect for the majority of the book, however there will be some pages where we don’t want the page numbering and headers to appear, like the beginning of a chapter. See the image below for an example.
The trick to solving this is to create another style of Master Page that can be applied to these pages, removing the header and page numbering.
- Start by clicking on the small drop-down box on the top right of the Pages panel and select New Master… Then change the ‘Based on Master:’ setting to display A-Master. This is really the only setting you need to change here. Then click OK.
- Now you should see a new pair of pages appear at the top of your Pages panel called B-Master. Now we can apply the settings for these pages.
- Double-click on the left hand page of the B-Master page and it will open up the editing options for this page. To enable editing here you must select Override All Master Page Items from the drop down menu of the Pages window (Ctrl+Alt+Shift+L). For my book ‘Ark of the Gods’ I removed the page numbers and headers from every page where a new chapter begins, meaning I just removed all the text boxes from the left and right facing pages of my B-Master. If you have page numbering positioned in the bottom centre of your page you might decide to leave it and just remove the headers, but for my book I found it a little intrusive and out of place above the chapter title. When you’re finished, move to the right-facing page and make sure you double-click the right B-Master page on the pages tab and select the override command again. You can always tell which master page you’re editing because the tiny page in the pages tab will be highlighted blue. A shortcut to editing both pages at once is to double-click the B-Master name beneath the two pages and it will automatically select both pages, highlighting them both blue, then your override command will apply to both.
- When you’ve made your changes, double-click one of your manuscript pages in the Pages tab to return to your book.
- Find a page where you want to apply the B-Master settings applied, then select and drag the left or right B-Master page onto that page. You should now see the manuscript page change from displaying a letter ‘A’ in the top corner to a letter ‘B’, meaning any changes you applied in the B-Master page are now applied to that page. Now you can just go through your manuscript and apply the B-Master page wherever necessary.
If you’ve followed all these steps, you should have a manuscript looking ready for print. Well done! However, there’s a few more steps to really finish it off, like creating a Table Of Contents, fixing up the annoying Widows & Orphans, and adding the front and rear matter to the book. I’ll cover those steps in separate articles.
If you’re new to Indesign then I hope this guide helped you create your first POD (Print On Demand) book.
Thanks for reading and please add any tips or suggestions to the comments below.